

Introduction: Wooden Mac Mini Tambour Riser Organizer


Like probably many others, I have accumulated a large number of small gadgets that lie on the table or the lid of the Apple Mac Mini. This time I decided to organize my workspace and developed a wooden organizer stand that is perfect for a Mac mini or Mac studio.
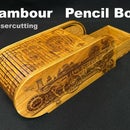
Introducing the Wooden Mac Mini Tambour Riser Organizer: a sleek, open-source solution to declutter your workspace while elevating your Mac Mini or Mac Studio experience.
Crafted from Cherry veneer and Alder veneer, this stand features a tambour door organizer drawer, providing convenient storage for small accessories and peripherals. Compact and precise in design, it seamlessly integrates with your setup while adding a touch of elegance.
As an open-source project, all design drawings and resources are available on GitHub, encouraging customization and modification to suit individual preferences. Streamline your workflow and enhance productivity with this stylish and functional organizer.
The video is very highly detailed with a description of each step!
Wooden Mac Mini Tambour Stand Organizer
#woodworking #macmini #tambour #stand #lasercutting #diy
Supplies
Tools:
- DIY Laser cutter/engraver 520x520mm, 5.5w
- Eccentric sander
Components:
- Cherry veneer 4.5 mm
- Alder veneer 4.5mm & 2.5 mm
- Glue: Titebond 3, 3M Scotch-Weld Fastbond 30, CA Glue + Activator
- Oil: cleaned flaxseed
- Wax
- Old roller blinds fabric (or other fabric)
Step 1: Download Sources and Cut With Laser


The DXF file for laser cutting contains information about the thickness of the material I used.
Attachments

Step 2: Create Alignment Frame


Step 3: Paint Alignment Parts With Wax


Step 4: Glue Bottom Side With Rails


Step 5: Sand Inner Box Parts


Step 6: Glue Inner Box


Step 7: Sand Drawer Parts


Step 8: Protect Inner Box With Adhesive Tape

Step 9: Glue Drawer


Step 10: Sand Drawer Edges


Step 11: Glue Handle

Step 12: Glue Top Side With Rails

Step 13: Create Frame for the Blinds


Step 14: Cut Tape From Old Roller Blinds (or Other Fabric)

Step 15: Sand Blinds and Place to the Frame


Step 16: Glue Fabric to the Blinds


Step 17: Cut Edges (to Release From Glue)


Step 18: Glue Holder for the Blinds


Step 19: Paint Rubbing Parts With Wax


Step 20: Install Blinds


Step 21: Glue Top Side


Step 22: Glue Decorative Side to the Blinds


Step 23: Glue Organizer Parts


Step 24: Protect Blinds With Adhesive Tape

Step 25: Sand Edges and Sides


Step 26: Cover With Mineral Oli


Step 27: Final Result


Participated in the
Anything Goes Contest


